- What Is a Borescope Camera?
- Why Use a Borescope in Tight Spaces?
- Choose the Right Camera for the Space
- Prepare Before Starting the Inspection
- Insert the Camera Slowly
- Adjust the Lighting
- Keep the Camera Steady
- Use a Flexible Borescope Camera for Curved Areas
- How to Inspect Pipes with a Borescope
- Inspecting Automotive Components
- Inspecting Walls and Other Hidden Areas
- Common Mistakes to Avoid
- Clean and Store the Camera Properly
- Final Thoughts
Inspecting areas that are difficult to reach can be frustrating, especially when you cannot see what is happening behind a wall, inside a pipe, beneath machinery, or within a narrow mechanical component. A borescope camera provides a practical way to examine these hidden areas without immediately taking equipment apart or creating unnecessary openings. With a small camera attached to a flexible or semi-rigid cable, you can view spaces that would otherwise be difficult or impossible to inspect directly. Learning how to use this type of inspection tool correctly can make maintenance, troubleshooting, and routine checks much easier.
What Is a Borescope Camera?
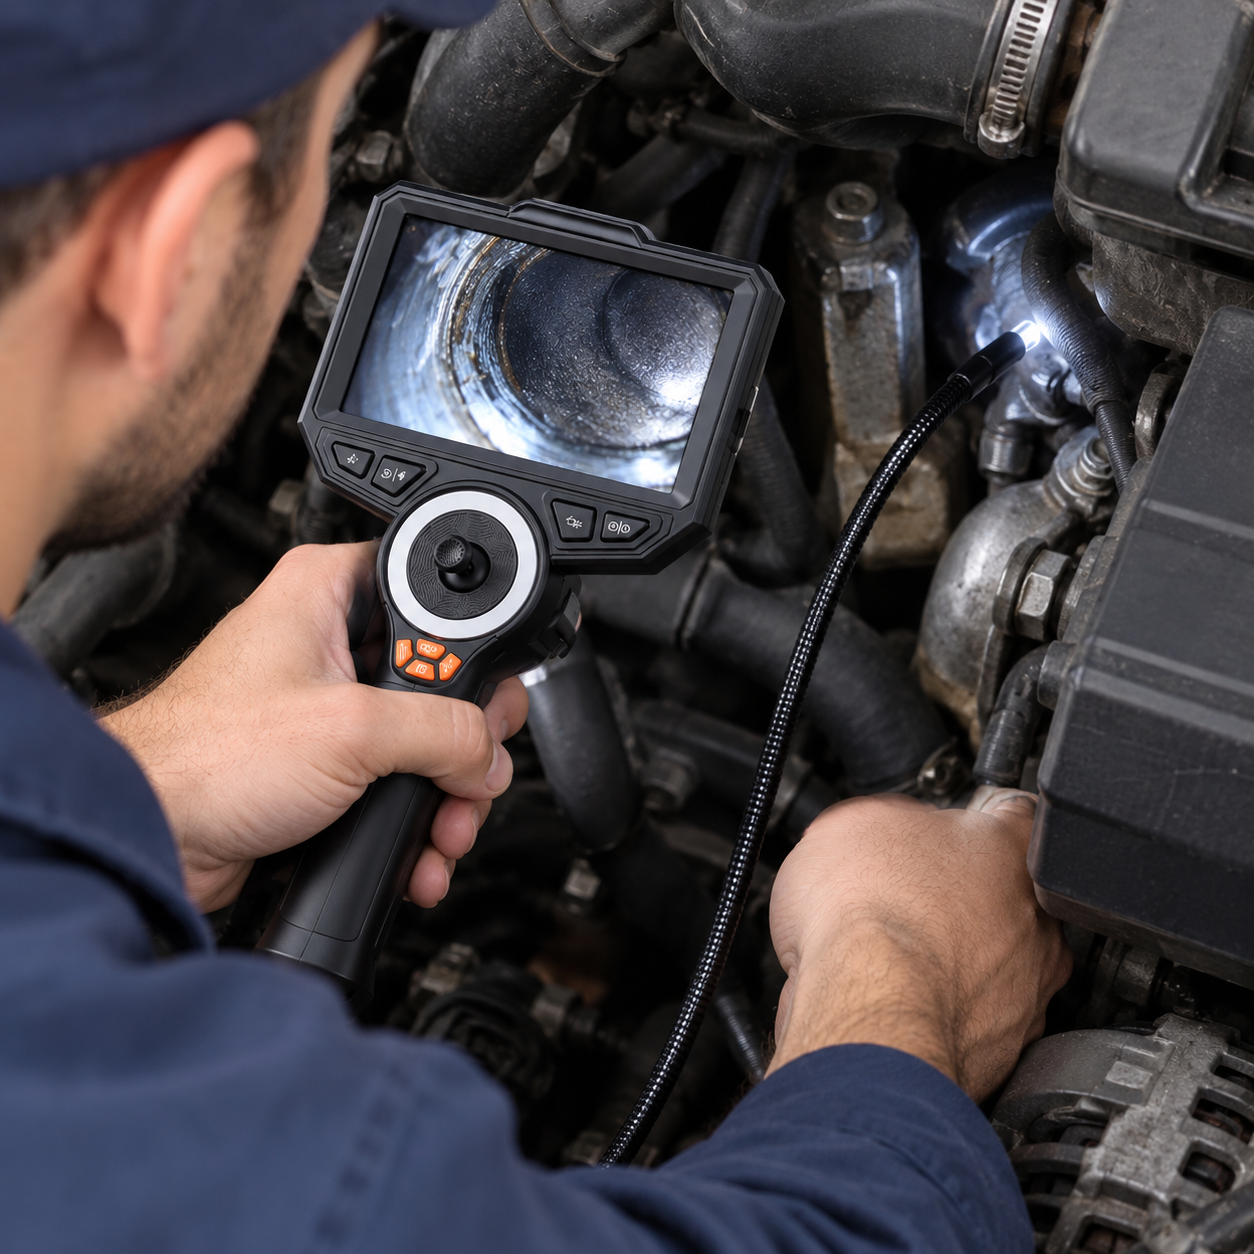
A borescope camera is a compact inspection device designed to help users see inside narrow, enclosed, or hard-to-reach spaces. Most systems consist of a small camera at the end of an insertion cable, a display or compatible viewing device, and built-in lighting around the camera.
The camera sends a live image to the screen, allowing you to examine an area without relying on a flashlight or trying to look through a small opening. Depending on the model, a borescope may also provide features such as image capture, video recording, adjustable lighting, different viewing angles, and waterproof camera heads.
These features make borescopes useful for a wide range of inspection tasks. Automotive technicians may use them to look inside engines or other components, while plumbers can inspect pipes and drains. Homeowners and maintenance professionals can also use them to investigate areas behind appliances, inside walls, or beneath floors.
Why Use a Borescope in Tight Spaces?
Many problems occur in places that are difficult to access. A loose component, blockage, crack, corrosion, or buildup may be hidden from normal view. Taking apart the surrounding equipment just to locate the problem can require significant time and effort.
A borescope can reduce the need for unnecessary disassembly. Instead of removing multiple components, you can often insert the camera through an existing opening and inspect the surrounding area.
Some common applications include:
- Inspecting pipes and drains
- Looking inside automotive engines
- Checking machinery and equipment
- Inspecting HVAC components
- Examining wall cavities
- Checking narrow gaps around appliances
- Inspecting ducts and ventilation systems
- Looking beneath floors or raised platforms
- Checking hard-to-reach mechanical components
The tool does not necessarily replace professional inspection methods, but it can provide useful visual information before deciding what action should be taken.
Choose the Right Camera for the Space
Before starting an inspection, consider the size and shape of the area you need to examine. Not every inspection camera is suitable for every space.
The diameter of the camera head is particularly important. If the camera is too large, it may not fit through the available opening. For very narrow areas, look for a compact camera head designed for confined inspections.
Cable length is another factor. A short cable may work well for inspecting a small machine, while pipe or wall inspections may require considerably more reach.
You should also consider the cable’s flexibility. A cable that is too rigid may be difficult to guide around bends. On the other hand, a cable that is extremely flexible can sometimes be harder to control. The ideal level of flexibility depends on the type of inspection.
Prepare Before Starting the Inspection
Good preparation can make the inspection faster and more productive. First, identify the area you want to examine and find a suitable entry point.
For example, when inspecting a machine, you may already have an access hole or removable component that provides an opening for the camera. When inspecting a pipe, an existing access point may provide the easiest route.
Clean the camera lens before beginning. Dust, grease, or other material on the lens can reduce image quality and make small defects harder to identify.
It is also helpful to check the camera’s battery level and make sure the display is working properly. If the camera has adjustable lighting, test the light before inserting the cable.
For equipment inspections, follow appropriate safety procedures and make sure moving machinery is safely shut down before inserting an inspection camera.
Insert the Camera Slowly
Once you have identified the entry point, insert the camera slowly and carefully. Avoid forcing the cable if you encounter resistance.
A common mistake is to push the camera forward too quickly. This can make it difficult to understand where the camera is positioned and may cause the cable to bend in an undesirable direction.
Instead, move the camera a small distance at a time while watching the display. This allows you to understand how the camera responds to your movements.
When the camera needs to travel around a corner, gently rotate or guide the cable rather than applying excessive force. Patience is especially important when inspecting narrow pipes or complicated machinery.
Adjust the Lighting
Lighting is one of the most useful features of a modern inspection camera. Tight spaces are often dark, and simply inserting a camera without adequate illumination may produce a poor image.
Start with a moderate light level and adjust it according to the environment. Too little light can hide details, while excessive brightness can create glare on reflective surfaces.
For example, metal components can reflect strong LED light directly back toward the camera. Reducing the brightness may sometimes provide a clearer view of the surface.
If the camera has adjustable LED lighting, experiment with different levels while observing the screen.
Keep the Camera Steady
A steady camera produces a much clearer inspection. Once you reach the area of interest, pause for a moment rather than constantly moving the cable.
This is especially useful when looking for small cracks, corrosion, loose components, or other changes in surface condition.
If you find something important, hold the camera in position and examine the area from several angles. Moving slightly closer or rotating the camera can reveal details that were not visible from the original position.
If your device supports photographs or video recording, capture useful findings for later reference.
Use a Flexible Borescope Camera for Curved Areas
Straight access points are relatively easy to inspect, but many real-world inspection areas contain bends and curves. Pipes, ducts, engine compartments, and machinery can have complicated internal paths.
A flexible borescope camera can make these inspections more manageable because the insertion cable can be guided through curved or restricted spaces. The key is to control the cable gradually instead of trying to force it through a bend.
When using a flexible cable, guide it with one hand while watching the screen. Small movements can make a significant difference to the camera’s viewing direction.
For longer inspections, it can help to pause periodically and confirm the camera’s position. This prevents you from losing track of where the camera is located.
How to Inspect Pipes with a Borescope
Pipe inspection is one of the most practical applications for a borescope. Pipes can develop blockages, buildup, corrosion, cracks, or other problems that are difficult to identify from the outside.
Start by selecting an appropriate access point. Insert the camera slowly and monitor the display as it moves through the pipe.
Pay attention to changes in the pipe’s surface. Look for unusual buildup, discoloration, cracks, standing water, or objects that may be restricting the passage.
Do not rely only on a single view. Rotate the camera when possible so that you can examine the surrounding surface.
When you find a suspicious area, move the camera slightly backward and forward to understand its size and position. Recording the inspection can also help when discussing the issue with a plumber or maintenance professional.
Inspecting Automotive Components
Borescopes are also useful in automotive maintenance. Some engine and mechanical components have narrow openings that make direct visual inspection difficult.
An inspection camera can help you examine areas around spark plug openings, cylinders, hoses, and other suitable access points, depending on the vehicle and camera design.
Always follow the manufacturer’s maintenance instructions and ensure the engine and relevant components are safe to inspect. Never insert a camera into an area where it could become trapped or damaged.
When examining an internal component, move slowly and avoid touching delicate surfaces unnecessarily.
Inspecting Walls and Other Hidden Areas
A borescope can also help investigate spaces behind walls or other structures when there is an appropriate access opening. For example, an inspection may help identify what is located inside a cavity before further maintenance work is performed.
However, care is important when inspecting walls because electrical wiring, plumbing, insulation, and other components may be present. The camera itself should not be treated as a substitute for proper safety procedures or professional assessment.
If you are unsure what is behind a surface, stop and seek appropriate professional guidance rather than pushing the camera farther into an unknown area.
Common Mistakes to Avoid
Using an inspection camera is relatively straightforward, but several mistakes can reduce its effectiveness.
Pushing too hard: If the camera stops moving, do not force it. The cable may be caught on an obstruction or sharp bend.
Ignoring lighting: Poor lighting can make an inspection image difficult to interpret.
Moving too quickly: Fast movement makes it easier to miss important details.
Failing to clean the lens: Dirt or grease can make the entire inspection appear blurry.
Using the wrong camera size: A camera head that is too large may not fit into the inspection opening.
Forgetting to record important findings: If the camera supports image or video capture, saving useful findings can make future comparison easier.
Clean and Store the Camera Properly
After completing an inspection, clean the camera and insertion cable according to the manufacturer’s instructions. If the camera has been exposed to dirt, moisture, grease, or other contaminants, cleaning it before storage can help keep the equipment ready for its next use.
Avoid wrapping the cable too tightly, especially if it is designed to remain flexible. Store the camera somewhere dry and protected from unnecessary impact.
If the camera has a rechargeable battery, follow the manufacturer’s charging and storage recommendations.
Final Thoughts
A borescope can make tight-space inspections significantly more convenient by providing a view into areas that are otherwise difficult to reach. The most effective approach is to select the appropriate camera size, prepare the inspection area, use adequate lighting, and move the insertion cable slowly and carefully.
For curved pipes, ducts, machinery, and other restricted areas, a borescope camera for tight spaces can provide the reach and visibility needed to investigate potential problems without immediately dismantling surrounding components. Combined with careful handling and proper safety precautions, an inspection camera can become a useful tool for maintenance, troubleshooting, and routine visual checks.
Whether you are examining plumbing, automotive components, machinery, or another confined area, taking your time during the inspection is usually more useful than simply pushing the camera as far as possible. A clear, methodical inspection can help you understand what is happening inside a space and determine what should be done next